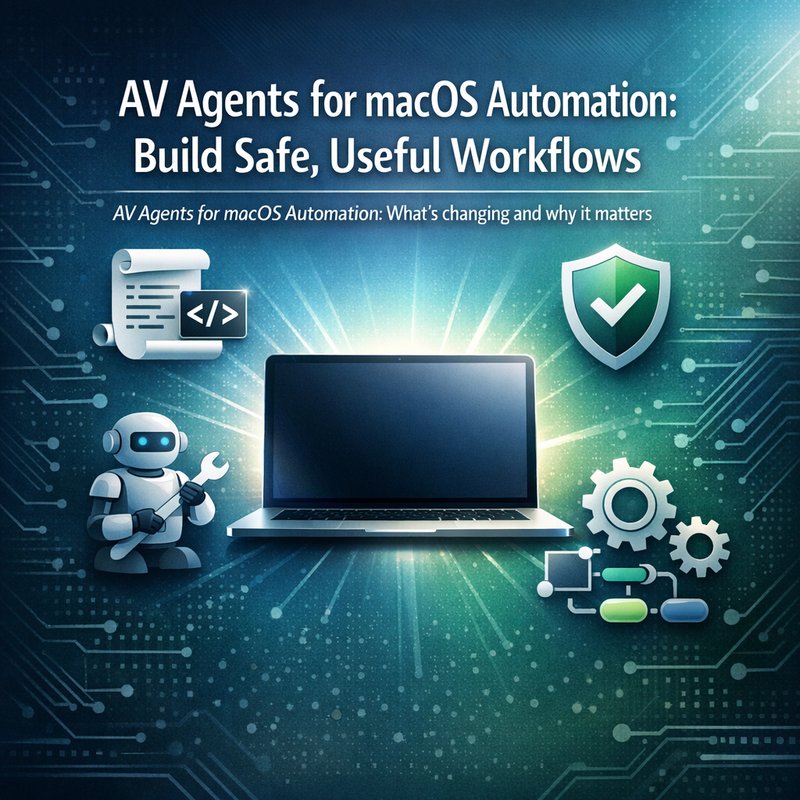
AV Agents for macOS Automation: What’s changing and why it matters
AV agents for macOS automation are starting to look less like “cool demos” and more like real tools people can trust. A good example is the macOS Harness released by the browser-use team, an open-source Python tool that gives LLMs raw access to macOS primitives like the accessibility tree and AppleScript.
If you’re building an agent that can click around, read screens, and trigger actions, macOS is a tricky place. It has permission prompts, privacy settings, app sandbox rules, and lots of UI edge cases. But the moment you can connect an agent to system-level signals, the whole experience changes.
And here’s the honest part. Most “agents” break right before they become useful. They get stuck in loops, they take the wrong action, or they do something the user did not intend. That’s why “AV agents for macOS automation” is not just about capability. It’s about building guardrails so your agent stays helpful.
In this article, I’ll show you how to think about AV agents for macOS automation, how the macOS Harness fits in, and how to design safety checks that keep your workflow reliable.
You can also explore more hands-on agent ideas on Neura’s site at https://meetneura.ai and the product overview at https://meetneura.ai/products.
What are AV agents for macOS automation (in plain language)?
Let’s shrink the big idea down.
AV agents for macOS automation means an AI agent that can:
- See parts of your macOS UI (for example, through the accessibility tree)
- Decide what to do next
- Run real system actions (for example, via AppleScript or UI events)
- Keep going through a goal, not just a single prompt
So it’s like giving your assistant a “robot hand” that can interact with your Mac.
But it’s also like hiring a new helper who could do the wrong thing if you don’t train and supervise.
So building AV agents for macOS automation usually comes with three needs:
- A way to observe the UI (so it knows where buttons and fields are)
- A way to act (so it can click, type, open apps, run scripts)
- Safety gates (so it can’t do risky actions without approval)
The macOS Harness is strong on the first two parts. It aims to provide LLMs access to system primitives so they can perform tasks autonomously.
Source: macOS Harness mention in the current research results via the search redirect
https://vertexaisearch.cloud.google.com/grounding-api-redirect/AUZIYQFRm3QDkv6prL6ubEmSr8NLU8j_PzAqGhN23FS71M7H8Ec2rOd1HO6YB70sYiK5I-nT4AWPYzjxnoV0OqH5M4oWi5U94L_ub0W8rCBoAkUGb71xxVSkt0zgUCNCJR8jVJVHQUymYW8Edd1ddXvEXHlyNiq1TsB_8QwsTqFTYJL4ddpPiIb3vQ==
Why the accessibility tree matters more than screenshots
A lot of agent demos use screenshots. They look cool. But they can be brittle.
If you use screenshots only, you’re forcing the model to guess where UI elements are. UI changes, themes change, font sizes change, and the agent may miss a control.
The accessibility tree is different. It’s structured. It gives semantic information about UI elements such as:
- What the element is (button, menu item, text field)
- Its label or role
- Sometimes location and state
That’s extremely useful for AV agents for macOS automation because the agent is less dependent on “pixel guessing.”
In practice, this means your agent can do things like:
- Find a “Search” field by label
- Click a menu item by its accessibility name
- Verify that a dialog opened before typing into it
That verification step is key. It turns “robot behavior” into “agent behavior with feedback.”
AppleScript as the action layer (the good and the dangerous)
AppleScript is a natural match for AV agents for macOS automation because it can control apps and system events.
But AppleScript is also powerful. Power creates risk.
A smart design does not let the model freely run any script. Instead, you use AppleScript as a narrow action layer inside a controlled workflow.
Here’s the pattern I like for AV agents for macOS automation:
- The model proposes an action in plain steps
- A safety gate checks the action (risk level, target app, user intent)
- Then the system runs a restricted AppleScript template
For example, you might allow actions like:
- “Open app X”
- “Click button Y”
- “Type text into field Z”
- “Export a file to a known folder”
But you block or require extra confirmation for actions like:
- “Delete files”
- “Install software”
- “Change system settings”
- “Send emails or messages”
In other words: AV agents for macOS automation should be able to act, but only inside a cage you control.
How to structure an agent so it doesn’t get stuck
If you’re building AV agents for macOS automation, one of your biggest problems is “agent loops.” The model keeps trying the same action because nothing changes, or it keeps redoing earlier steps.
A helpful solution is to structure tasks into small phases with checks after each phase.
A simple phase model for AV agents for macOS automation
- Plan: What are the steps for the goal?
- Scan: What UI elements exist right now?
- Act: Run one action only (not 10 at once).
- Confirm: Did the expected UI state change?
- Repeat or stop: If confirmation fails, re-plan or ask the user.
The “Confirm” step is what most demos skip. It’s also where reliability comes from.
Add “stop conditions” (seriously)
Examples:
- Stop if the same UI element is clicked 3 times and nothing changes
- Stop if a risky action is proposed
- Stop if the target app is not visible
- Stop if a permission prompt appears unexpectedly
This makes your AV agents for macOS automation feel less like chaos and more like careful work.
Safety gates for AV agents on macOS (practical checklist)
Let’s talk about safety without vague words.
Your AV agents for macOS automation should check at least these categories:
1) Permission and consent gates
macOS can show permission prompts for accessibility and automation.
Your agent should:
- Detect when a permission prompt is present
- Pause and ask the user to approve it
- Resume only after the approval is confirmed
Don’t let the agent pretend it has access if it doesn’t.
2) Target app gates
Your agent should verify the active app before executing actions.
Example:
- If the task goal is “rename a file,” ensure Finder is the active context
- If the task goal is “draft a message,” ensure the correct messaging app is open
- If none matches, re-scan first
3) Action risk gates
You should label applescript templates (or UI commands) as:
- Low risk: typing text, selecting a menu, exporting to a chosen folder
- Medium risk: deleting a single file after confirmation, editing settings inside an app
- High risk: deleting large directories, changing system-level settings, installing software, sending messages
Then require explicit user approval for medium and high risk actions.
4) Data gates
Your agent should avoid leaking sensitive info into logs or external requests.
If your agent stores UI text for analysis:
- Redact emails and phone numbers
- Shorten long text (summarize locally)
- Keep full transcripts only when the user asks
If you’re storing outputs, consider using a secure local store instead of plain files.
Building a “proposal then execute” command pattern
One approach that works well for AV agents for macOS automation is to split the loop into two parts:
- Proposal
The model outputs a structured command like:
- target_app: “Finder”
- action: “click”
- selector: “Rename…”
- params: {…}
- Execution
Your code checks the proposal against rules and then runs:
- Accessibility queries
- Then a single AppleScript action
This pattern is simple, but it’s powerful. It prevents “freeform AppleScript.”
To keep things safe, don’t let the model output raw AppleScript directly.
Instead:
- Keep a library of allowed AppleScript snippets
- Map model actions to those snippets
If you want a broader look at agent ecosystems and tool integration trends, you can also review related agent projects mentioned in the search results like OpenClaw and Hermes:
https://vertexaisearch.cloud.google.com/grounding-api-redirect/AUZIYQFPnwdM9A1MOhK-i7PacMKw96Lq5PeTO16JGxFUyk9mjVv3X4OxH1MVLwrjNmTv2w0O3D1o_Du_PqpIic7ZIJ4B2XyNOil8zIgtqBvFTCD_asVhXgI=
Using managed agent environments to reduce surprise
When you let an agent touch a real machine, isolation matters.
The search results mention managed environments for agents like OpenClaw and Hermes, including one-click MCP integration:
https://vertexaisearch.cloud.google.com/grounding-api-redirect/AUZIYQEK94MACf2ECuN7SyyZ4IbnO6VgySVxZT0wgFwspZWEynvLHVWbK7O3b8C_AfqPzSYxRXFQCxsaE05Atg9vgXC5qlJQVmv1V8YXEY14Q2ppGIg7rbL904CevlNXabSmt_SjpotZPZivcOFE5j-mMDYQp2zjky1PMJeBWEPbM-8iGP98aub9sS0MCUfJTkNry-7m
Even though that result isn’t specifically macOS Harness, the underlying lesson is right for AV agents for macOS automation:
- If you can run and test automation inside isolated setups, you reduce the chance of the agent messing with the wrong files or accounts.
- You can also test safety gates without risking production data.
For your own projects, “isolation” can mean:
- Using a dedicated test user account
- Using a sandboxed folder for outputs
- Running the agent on a clean machine image
- Keeping separate API keys and secrets per environment
A reliability test you should run before you trust the agent
Here’s a simple test plan I recommend for AV agents for macOS automation.
Test 1: “UI drift” test
- Change window size
- Move the window to a different monitor
- Open and close a few dialogs
- Then run the same task again
If your agent depends on exact UI positions, it will fail.
If your agent uses the accessibility tree properly, it survives.
Test 2: “Permission prompt” test
- Block accessibility access
- Run the agent
- Confirm it pauses and asks the user
Good agents stop. Bad agents continue and spam errors.
Test 3: “Wrong target” test
- Open a different app
- Ask the agent to do a Finder-related task
- Confirm the agent re-scans and refuses execution until correct context is found
This tests your target app gate.
Test 4: “No-op action” test
- Make it so clicking an expected button does nothing
- See if your stop condition catches it and re-plans
This prevents infinite loops.
Where Truelens fits (and what it teaches beyond compliance)
One of your current search results references Truelens as a way to spot compliance gaps and reduce time spent on specific checks:
https://vertexaisearch.cloud.google.com/grounding-api-redirect/AUZIYQGLcOab4KIo2hynCopsALbtqYue_SjDeGaye42H7_mOtdtt_K4OZ200ifktmoiWE87rPU7HxkxvPDA4umh4JB6ktPVaoMfMdimAHOQuLtgQC1OeRlB7SFPD-f9N903sVqmpJZSFCnMoPKevfZWzHochfkhaW0shPzL0l_4Ym_l9yyA=
Here’s the non-legal takeaway for AV agents for macOS automation:
Even if you are not doing formal compliance work, you still need to measure and review what your agent actually does.
Truelens is often used to evaluate LLM behavior and detect issues. The broader lesson is: build a review loop.
So for your macOS agent, you can add an “observation and review” stage like:
- Record UI states before and after actions
- Record what the agent intended
- Flag surprising actions for human review
- Build dashboards for frequent failure modes
This makes your AV agents for macOS automation improve over time.
If you want, you can also use Neura’s research-focused engine conceptually as a model for “always attach sources,” though macOS execution is a different layer: https://rts.meetneura.ai/.
How to start: a practical mini roadmap
If you’re starting from scratch, you don’t need a huge system on day one. Start small.

Step 1: Choose one task
Pick a task with clear steps that doesn’t touch risky system changes.
Examples:
- Rename a file and move it to a test folder
- Create a note and paste text into it
- Export a document from an app into a known folder
Step 2: Use accessibility to locate elements
Make the agent find UI elements by accessibility labels and roles, not by visual guessing.
Step 3: Use restricted action templates
Avoid raw script generation.
Instead, map model actions to a fixed set of safe commands.
Step 4: Add confirm steps
After each action, verify the expected UI change.
Step 5: Add stop conditions and user pause
If permissions fail, pause.
If the context is wrong, ask for a fix.
Step 6: Run the four reliability tests
This tells you if the system is ready to be “used,” not just “shown.”
Common mistakes with AV agents for macOS automation
Let’s save you some pain.
Mistake 1: Letting the model do too much at once
If you execute 10 actions per turn, debugging becomes miserable. Also, unexpected actions slip in.
Mistake 2: No “are you sure?” for high risk
Models will sometimes do what you asked, but not how you meant. A confirm step prevents accidents.
Mistake 3: Skipping permission detection
Agents that ignore permission prompts will fail in confusing ways.
Mistake 4: Not testing UI drift
A demo that works on one laptop screen often fails for everyone else.
A security mindset that fits real teams
Security is not a single checkbox. With AV agents for macOS automation, security is a set of habits.
Here are habits I’d build into your team workflow:
- Keep logs, but redact sensitive UI text
- Use separate credentials per environment
- Use allowlists for actions
- Always verify UI state transitions
- Treat agent runs as untrusted until proven safe
If you want a neighbor tool that focuses on key leak scanning for frontends, Neura has Keyguard:
https://keyguard.meetneura.ai/
Again, this is not macOS automation itself, but it shows the mindset of “find issues before they hurt you.”
Conclusion: AV agents for macOS automation should feel dependable, not magical
AV agents for macOS automation can absolutely save time. But the difference between “cool” and “useful” is reliability and safety.
The macOS Harness points toward a practical direction: give LLMs access to the accessibility tree and AppleScript-like system primitives. That’s a strong foundation.
Then you build the rest:
- observe correctly
- act in small steps
- confirm changes
- stop when uncertain
- require approval for risky commands
If you do that, your AV agents for macOS automation will become something people trust with real work.
And that is the real goal. Not just automation. Dependable automation.
start
Additional Content
TWITTER_POST_THREAD_CONTENT:
1/5
AV agents for macOS automation are moving from demos to real workflows.
The macOS Harness puts LLMs in touch with the accessibility tree and AppleScript, which makes UI control much more structured.
But the key is safety gates. Otherwise the agent can loop or do the wrong click.
#meetneuraai #neuraai
2/5
What makes it work is the feedback loop: observe, act, confirm.
After each action, check if the UI actually changed.
If not, stop or re-plan. That one step is why AV agents for macOS automation can feel dependable instead of chaotic.
#meetneuraai #neuraai
3/5
A strong design also uses allowlists for AppleScript actions.
Don’t let the model generate raw code freely.
Map model “intent” into restricted templates with risk labels and user approval for risky actions.
That keeps power under control.
#meetneuraai #neuraai
4/5
Test before you trust.
Run UI drift tests, permission prompt tests, wrong target tests, and no-op action stop conditions.
If your AV agents for macOS automation fail there, they’ll fail in real life too.
#meetneuraai #neuraai
5/5
If you’re building an agent that touches macOS UI, reliability is the whole game.
Here’s a step-by-step guide that breaks down the safety and reliability parts.
https://blog.meetneura.ai/av-agents-macos-automation
#meetneuraai #neuraai #macos #aiagents #automation
INSTAGRAM_POST_CONTENT:
AV agents for macOS automation are getting real fast.
One new open-source direction is the macOS Harness (from the browser-use team). It helps an LLM read the accessibility tree and trigger system actions like AppleScript.
That matters because screenshots alone can be flaky.
With accessibility data, your agent can find real UI elements by label and role, which makes behavior more consistent.
But here’s the thing.
Power without guardrails is how agents get stuck or mess up.
The safest workflow is: propose an action, check it, then execute one step at a time.
After every step, confirm what changed on screen.
If nothing changes, the agent should stop or re-plan.
If you’re building this, start with a low-risk task, keep outputs in a test folder, and run UI drift and permission prompt tests before you trust it.
This is the difference between “cool demo” and AV agents for macOS automation you can actually use.
https://blog.meetneura.ai/av-agents-macos-automation
#meetneuraai #neuraai #macos #aiagents #automation #python
FACEBOOK_POST_CONTENT:
AV agents for macOS automation are closer to “real assistants” than most people expect.
A tool called the macOS Harness (released by the browser-use team) gives LLMs access to macOS primitives like the accessibility tree and AppleScript.
That means the agent can interact with apps using structure, not guessing from screenshots.
Still, the magic only happens after safety gates are built in.
You want a simple loop: observe what the UI looks like, take one action, then confirm the UI actually changed.
Also, use allowlists for what scripts or UI commands the agent is allowed to run.
Pause for permission prompts.
Stop if the agent tries the same action 3 times with no result.
Run tests like UI drift and wrong target checks.
That’s how AV agents for macOS automation stop feeling random and start feeling dependable.
https://blog.meetneura.ai/av-agents-macos-automation
#meetneuraai #neuraai #macos #ai #automation #developers
LINKEDIN_COMPANY_POST_CONTENT:
AV agents for macOS automation are the kind of tech that can save a lot of time, as long as you build them to behave safely.
The macOS Harness (from the browser-use team) is interesting because it connects LLMs to the accessibility tree and system actions like AppleScript, which makes UI control more structured than screenshot-only approaches.
But capability is not the whole story. The article breaks down why you need a confirm step after each action, plus stop conditions for loops, and allowlists for risky commands.
If you are working on automation that touches real apps, this is the part most teams skip.
Start with one low-risk task, run reliability tests (permission prompts, UI drift, wrong target), and only then expand what your agent can do.
https://blog.meetneura.ai/av-agents-macos-automation
#meetneuraai #neuraai #aiagents #macos #automation #python #developers
YOUTUBE_POST_CONTENT:
AV agents for macOS automation can feel like magic, but the truth is they’re engineering.
A tool called the macOS Harness helps connect LLMs to macOS primitives like the accessibility tree and AppleScript, so agents can interact with real UI elements in a more structured way.
In this article, we focus on what makes the difference between a demo and a workflow:
- propose then execute (with action allowlists)
- act one step at a time
- confirm the UI state after each action
- stop when things go off track
- pause for permissions
If you’re building on macOS, this is a solid starting path.
https://blog.meetneura.ai/av-agents-macos-automation
#meetneuraai #neuraai #aiagents #macos #automation #devtools #python
LINKEDIN_REPOST_OF_COMPANY_POST_WITH_PERSONAL_ACCOUNT_POST_CONTENT:
When agents touch a real desktop, the problem is rarely “can it click?”
It’s “can it click the right thing, at the right time, without getting stuck when the UI changes?”
That’s why I like the approach in this article. It pushes for a clear observe-act-confirm loop, plus stop conditions and action allowlists.
Otherwise, you end up with agents that look impressive in a controlled run, then fail silently or repeat the same wrong action in real life.
Even small safeguards like pausing on permission prompts can save hours of debugging.
If you care about building AV agents for macOS automation that people will actually trust, this breakdown is worth reading.
Please check the company post for the full details and examples.
#meetneuraai #neuraai #aiagents #macos #automation #security
LINKEDIN_PERSONAL_ACCOUNT_SEPARATED_POST_WITH_ONLY_CHANGELOGS_UPDATE_POST_CONTENT:
Been working on our self-hosted AI agent codebase, and I shipped a set of reliability fixes that matter for real autonomy.
We fixed MiMo keyless onboarding by seeding default config when there is no existing config.toml section.
We also improved tool-call parsing so Xiaomi MiMo tool calls wrapped in <tool_call_list> work, and we added reminders so tool calls are structured JSON instead of prose.
On Linux, restart now execs the real binary path properly, and Telegram handling got better with a shorter settle window and grouped edit stream handling.
We also improved multilingual phantom self-heal by scanning intent phrase matching across all supported languages at once.
#meetneuraai #neuraai #ai #agentic #selfhosted #reliability #developertools
end